Nursery

I designed most of the spaces in my friend Susan’s house a few years ago. So this summer, when she called to tell me that she was pregnant, I couldn’t NOT do her nursery! We went with a coral white and grey color scheme, incorporating chevron here and there. Here’s what we came up with:

nursery, design, coral, chevron

Crib View

We made the ‘let her sleep… for when she wakes, she will move mountains’ piece by painting an old canvas that she had hanging around with our favorite coral piece, and then we applied vinyl letters when it was dry. Easy peasy!

quotes, art, diy, coral, nursery

Custom Artwork

We ordered the bedding custom and included a few special friends for Olivia to nap with 🙂

crib, nursery, design, chevron, elephant, giraffe

Close Up

On the other side of the room, we used the same paint from the canvas to paint frames she already owned and we put in her pregnancy pics, so cute!

We found the dresser at IKEA and it works perfectly as a changing table as well.

The curtains were customized with a coral strip sewn on the bottom, and Susan just fell in love with the texturized shag rug.

IMG_3225

They have one more room for another addition 😉 Maybe I’ll be posting a boys nursery room next!

Abacus

So I saw this amazing piece of wall art while browsing cb2 who knows how many years ago… And I thought it was unique and fun and colorful, but I did NOT want to pay the triple digit price tag on it… So I decided to make my own 🙂

Here’s the inspiration: cb2 abacus $149

abacus, diy, woodworking, crafty, cb2

cb2 Abacus

I used their original dimensions, because I liked the size of it.  And I went on the hunt for all the various parts! For the square frame dowels, I just bought a long piece from Home Depot, and cut it in store. I bought the small round dowels from the Hob and cut them down to size with my little IKEA saw kit. I measured and drilled out holes on the short pieces of the frame for the round dowels to nestle into. Then I spray painted it with some fancy ‘hammered look’ spray paint. Here they are in pieces!

woodwork, paint, diy, artwork

Painted cut frame pieces

The beads were fun to do, I didn’t stick with the inspired colors exactly… I found them with predrilled holes at the Hob also. I bought out two stores to have enough!

beads, paint, diy, woodwork, abacus

Painted beads

Then it was just assembling everything together! That was a little tricky, but I used wood glue and a few nails to secure the corners and then hung it up on the wall!

Abacus, diy

Finished Abacus

Let me know what you think of my finished piece! I may change the bead colors later, I’ve had a lot of fun with it though 🙂

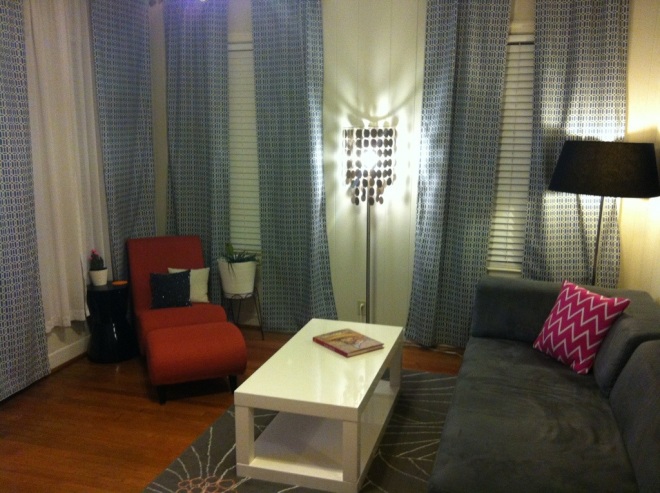
Curtains!!

20130615-211142.jpg

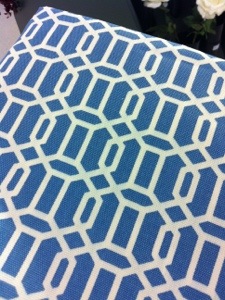
So this old house of mine has sooo many windows!! I finally decided to tackle the problem! 😉 I really wanted to go to the fabric district on Harry Hines, but as any good dallasite knows, you don’t want to be in that neighborhood past dark! And due to my nonstop schedule, I couldn’t make it over there any other time… So I was forced to buy my yards from the Hob! But I’m happy with my findings! I bought 9 yards to do 3 windows of this beautiful stuff:

blue geometric fabric.jpg
So this time around, I vowed to pin and iron appropriately!! I spent the bulk of my time preparing, but it was worth it! I measured, remeasured, ironed, pinned, sewed, and reironed before hanging! It made all the difference, I am so glad I took the extra time for the prep work. I also was able to bribe my Dad to hang them up with a home cooked meal! I hate hanging curtains so much though, it’s worth 50 meals to not have to address the awful task of screwing in the brackets! Thanks Dad 🙂 They turned out great!

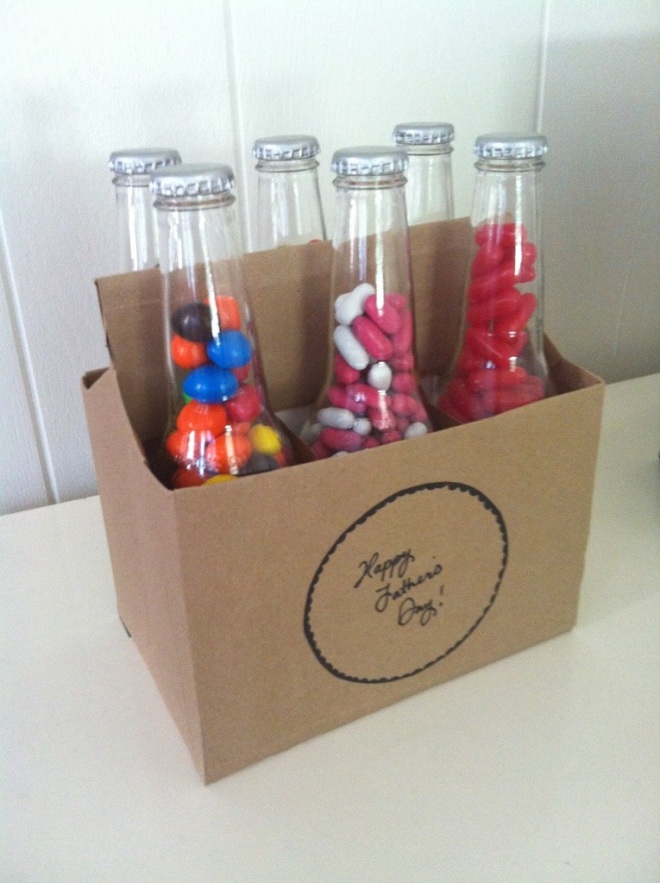
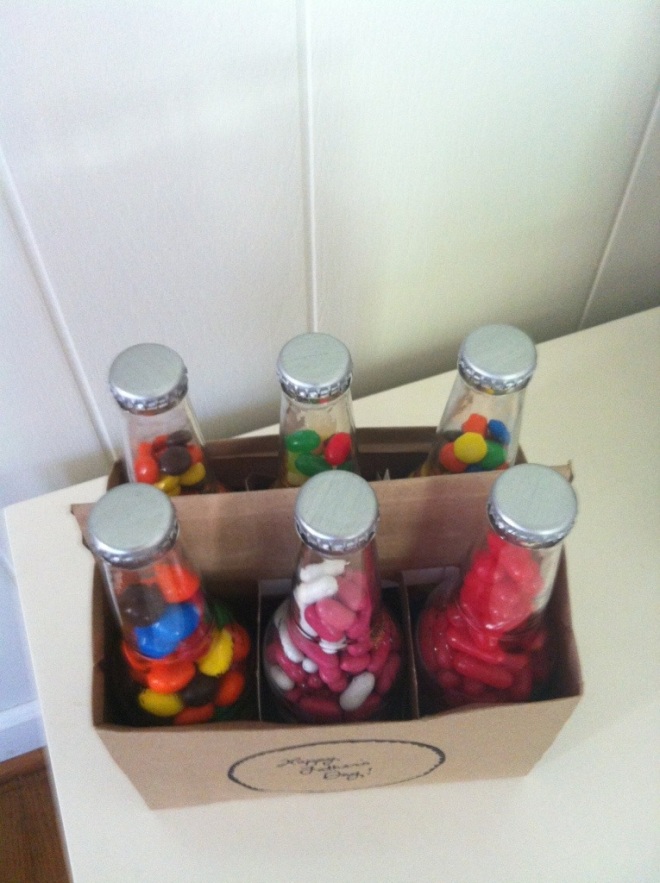
Father’s Day candy 6-pack

20130617-181143.jpg

I wanted a fun and creative gift for my Dad this year, especially since he’s so amazing and has been helping so much around my house lately! The other day he pointed out some candy bouquets at the grocery store as a joke, and it gave me an idea!! Candy 6-pack! So I went to work making his special treat!

First, I had to find a 6-pack of clear bottles so he could actually see the candy. I went with Miller Chill, but there are several others out there. Then, I had to empty the bottles of course…. 🙂

20130617-181224.jpg

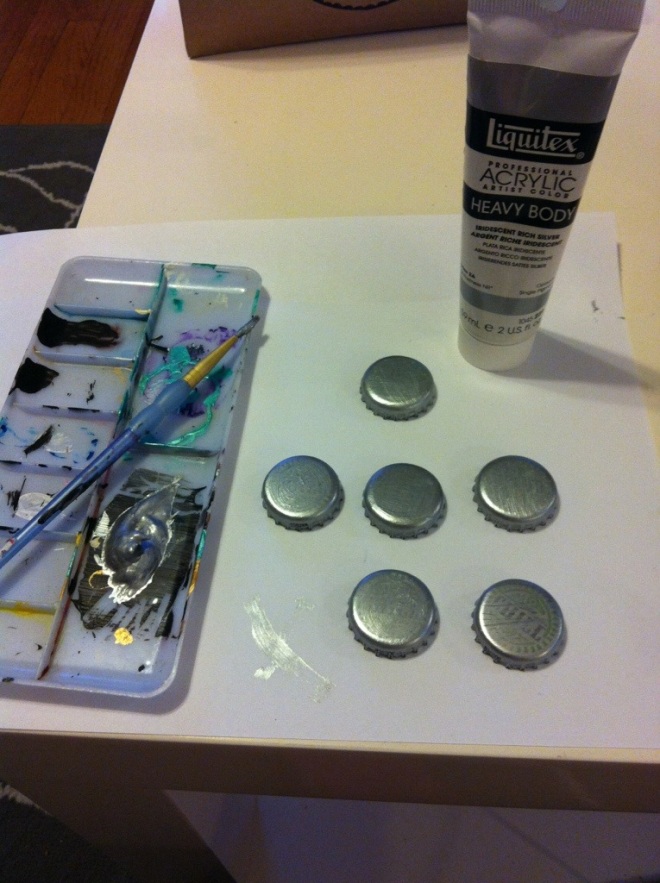
The tops had the Miller Chill logo on them, so I painted them silver to hide it.

20130617-181232.jpg

I covered the container with an old Whole Foods bag I had laying around. I know, I’m so green 😉 And I made the label separately so it would stand out.


I washed the bottles in a sink bath of hot water and a little bit of blue dawn soap. The labels peeled right off! Then I rinsed the inside with alcohol just to speed up the drying process.


20130617-181201.jpg

What do you think? What did you get your Dad this Father’s Day?

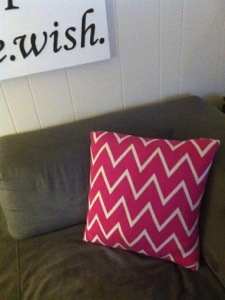
New pink chevron pillow!

20130615-112430.jpg

So I had this dull grey pillow that I was completely bored with, and I decided it was time for an upgrade! I had an old shirt lying around that was too big, but I loved the pattern… So why shouldn’t I lean on it??! I cut out a quick pattern, sewed three sides together and shoved in the padding from the boring old grey pillow. I hand stitched the last side, and I’m quite pleased with the results! 😉

20130615-112509.jpgStay tuned for the tutorial of the boring circle pillow too 😉

Exfoliation

woman-exfoliating-skin

When it comes to exfoliation, people hear a lot of conflicting opinions. The reason behind this is simple. Companies want to sell you products. The most beautiful skin I see is attached to the people who do the least amount of skincare steps. It’s the people who start out our consultation with “Well I know I can do more…” or “I feel so lazy about my skin.” The multi billion dollar skin care industry has brainwashed us all into thinking that if we don’t scrub every other day, use our Clarisonic brush morning and night, cleanse with an abrasive face wash, apply serum morning and night, mask once a week, and layer our moisturizers and sunblocks and creams and lotions that we’re just not trying hard enough! It’s just not true. The worst part is, the people who are just doing the basics are actually  feeling guilty that they’re not spending more time and money on their faces.

Now I’m not saying throw everything you own out and stop washing your face all together, I’m just saying to relax a little. 

I was brainwashed too for 8 of my 10 years of being an esthetician. I told my clients to scrub their faces raw because I thought it was what was best. It’s not. I ignored the fact that the clients I saw with the best skin always did so little. I blew it off thinking “they’re just blessed” and “it’s all genetics.”

What tends to happen more often than not, is I see over-exfoliated skin. We sensitize and over-process our skin then get frustrated that it’s no longer functioning the way we want it to. Think of your pores as tear drop shaped holes. We know there is a layer of dead skin on the surface that we are meant to slough off, but what tends to happen is we over do it. We scrub and scrub and scrub and eventually we have scrubbed away the important layers of skin too. So now you’re looking at the inside bulbous portion of this tear drop shape, the inside of your skin. You will experience enlarged pores, hydration fluctuations, longer healing times, dullness, and just generally not be too happy with your skin.

Fixing this is the easiest thing in the world. STOP over exfoliating!

I typically have my clients go on a two week “detox.” So two weeks of only cleansing, moisturizing and SPFing. You can go up to a month if you can handle it! What this does is lets the skin regain confidence in you. A classic over-exfoliated skin is expecting you to scrub it raw everyday. So it builds up a scaly, superficial layer to protect itself everyday. This also makes you think you need to exfoliate when you run your hands over your skin and it feels rough. The detox lets your skin start to rebuild stronger, healthier, more resilient skin.

After the detox, find your routine. Listen to your skin! It will tell you when it needs to be exfoliated. Read my cleansing post, and find the perfect cleanser. Get used to washing your face with your hands morning and night, then when it starts to feel a little rough, pick up a soft washcloth or your Clarisonic brush. I’ll write more about that later. Personally, my skin needs to be exfoliated about once a week. Maybe twice a month I’ll do an enzyme based mask.

The whole process takes around three months to really start seeing the changes in your skin. You’ll see pores get smaller, not because you’ve temporarily shrunk them with some dehydrating mask, but because the top of that teardrop shape is growing back in. You’ll see hydration issues (overly oily, flaky dry) resolve themselves because the pores that are creating the sebum are functioning normally again. Blackheads and pimples should decrease, your skin should glow again, and you’ll finally stop stressing about your skin everyday!

Cleansing

cleansing

Cleansing is where it all starts. Your skin doesn’t need to be “squeaky clean” or “deep cleansed” everyday. So changing your thinking about cleansing can change your skin. The majority of my clients are using a harsh cleanser that is stripping their skin and creating more problems than fixing. Everyone’s pH balance is a little different, but it’s slightly acidic. When a cleanser strips the pores of their natural oil, the skin fights back by producing more oil. It wants to fix itself. This causes all sorts of problems with hydration. People can feel tight and flaky and still get oily in the middle of the day.

Tune into your skin and pay attention to how it feels after cleansing. Does it feel tight, like you need to immediately apply moisturizer after rinsing? Does it feel like there’s a film covering the surface? It’s time for a new cleanser. Everyone’s skin is different, but the perfect cleanser is one that leaves your skin feeling soft and hydrated. Cleansers also don’t have to be expensive. Save your cash for eye creams and serums.

Some of my favorites are:

Cerave hydrating facial wash

302 sensitive cleanser Rx

Chevron Painting DIY

So chevron is kinda a big deal right now. Super easy pattern to paint too! So I wanted some blue sparkly chevron goodness to go over my bed. I’m also on a pretty tight budget, so I wanted it to be cheap. 🙂 So I bought a really inexpensive canvas at the Hob, and I measured out how big I wanted my stripes to be. I wanted some chunky big stripes, and I wanted them to be three columns across. Cue some math… And some erasing… And I had my lines drawn! Then I started taping off the edges with plain old blue painters tape.

I had bought a gallon of this gorgeous blue paint for a wall in this apartment that I had painted when I moved in, and I had some extra! If not, I probably would have used acrylic paint. Now I will share a crucial step that I completely skipped… Before you paint the dark color (in my case navy blue) paint the other color over the edge of the tape (in my case white) so that it bleeds under the tape instead of the dark color…. If you’re a perfectionist, this is a huge deal… So when I was finished painting, while it was still wet, I sprinkled a little glitter over it. Because, who doesn’t need more sparkle in their life?

I am still pretty happy with my results, but the edges are definitely blurry! Maybe I’ll pretend they’re supposed to be that way…

New Design ideas

So I’m moving soon into an adorable nearly 100 year old house and I am so excited to decorate it! In honor of Pantone’s color of the year for 2013, I want emerald to be featured strongly in the living room.

Probably in the form of curtains, with a bold pattern? There’s tons of windows, so tons of curtains! I’m going to spend a fortune on fabric this year… Also I’d like to recover some old pillows I’ve had, or maybe splurge and actually buy new ones! I’m thinking of an accent color now to blend the emerald with my greys and whites… Here’s my brainstorm in pictures…


I’ve always wanted to paint something Rothko-esque… LOVE his work!

Stand by for a possible tutorial 😉

I’m liking gold as an accent. What do you think?

Jewelry Mirror DIY

Today I was feeling like I had to let the creative juices flow. I’ve had the STAVE hinged wall mirror from IKEA for a few years, and at a previous apartment I had put pushpins in the wall behind it for jewelry. Well seeing as how I move constantly, I decided it would be more beneficial for me to install more permanent and more aesthetically pleasing hooks to the back of the mirror! Hence my first bloggable project 🙂

stave
So I decided to line the back with a black suede fabric to cover the plain white backing. And conveniently enough, I had some extra fabric just laying around! To prepare, I painted the raw wood support slats black and then painted around the perimeter just in case my fabric placement wasn’t perfect.

I attached the fabric with spray adhesive, and smoothed out any air bubbles with my hands.

I found wooden rods from Hobby Lobby (the Hob) and a fun metallic paint color to make them pop against the black suede! I cut them with my handy dandy saw kit from IKEA.

The search for hooks went on for awhile, and I finally found a set of 100 from Home Depot for like $5. I measured and predrilled holes in the rods so that I wouldn’t kill my hands when I twisted the hooks in. I made the earring and necklace hooks 2 inches apart, and I made one row 3 inches apart for bracelets. I scored the sides of the mirror with a white pencil and glued the rods on with plain old Elmer’s glue-all.

Here’s the finished product! I’ll take a nicer picture once I move and get it hung!